
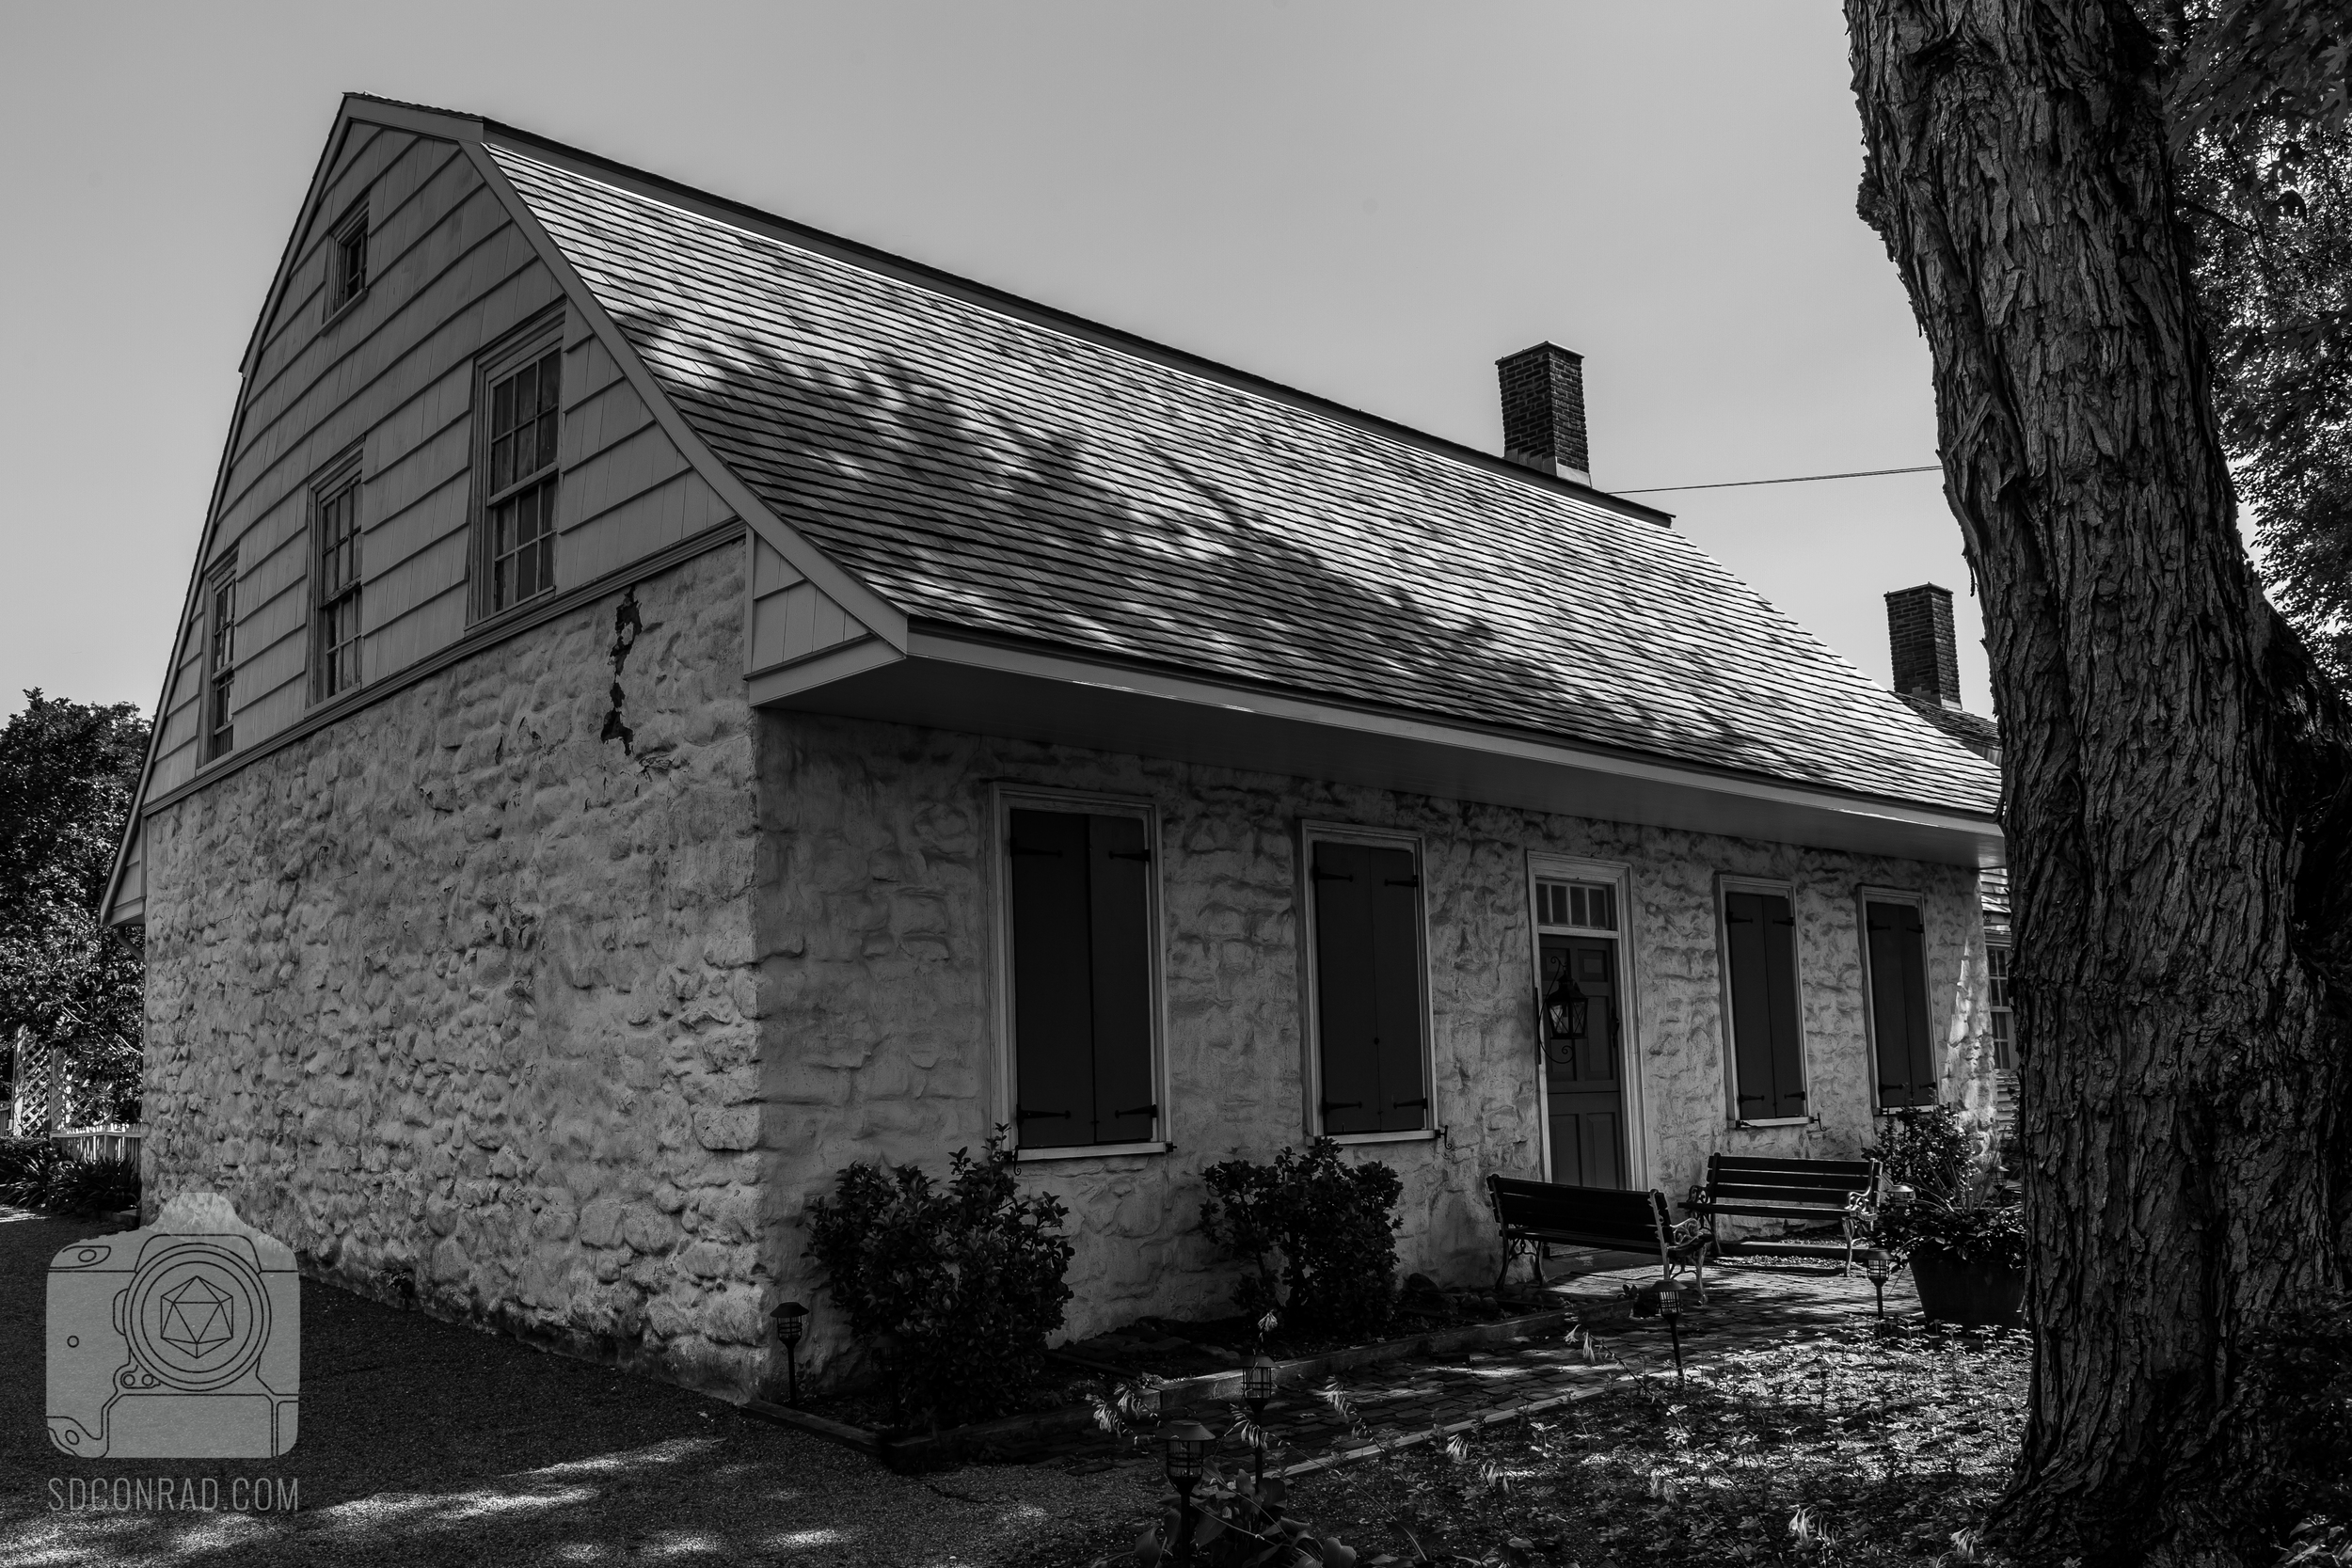
Onderdonk House
Bushwick, Brooklyn and Ridgewood, Queens have a long history of border disputes, which have resulted in the zig-zag pattern of the border today. But there's one building Bushwick can't claim, and that's the Onderdonk House of Ridgewood, Queens.
The neighborhood where I live is a hotly contested spot. Sometimes it belongs to Queens, sometimes it belongs to Brooklyn. As of right now, the border forms a zig-zag pattern down one street. So when you walk down the street you can say "I'm in Brooklyn. Now I'm in Queens! Now I'm back in Brooklyn!" without leaving that same street. But there's one building in Ridgewood, Queens that Brooklyn can't lay its hands on, and that's the Onderdonk House.
The land was acquired by Hendrick Barents Smidt as a grant from Peter Stuyvesant in 1661. At that time, Stuyvesant was the Director-General of the Dutch Colony New Amsterdam. Which, of course, was renamed New York in 1667 after a trade with the English.
In 1709 Paulus Vander Ende purchased the land from Hendrick Barents Smidt and built the stone house that currently sits on the land, just next to the foundation of Smidt's house. "Onderdonk House" is the shortened version of the full name, which is Vander Ende-Onderdonk House. Smidt's name is not included because techincally, the house that currently stands, isn't the one that Smidt built. The Onderdonk family adds their name later.
1769 is when the border disputes between Newtown, Queens and Bushwick, Kings (Brooklyn) which resulted in the zig-zag pattern we have today. Although the zig-zag has changed a few times over the years as the dispute rages on. Some buildings even begin in Brooklyn and end in Queens.
1820 saw renovations under new ownership. Adrian Onderdonk extended the house to include the foundation of the Smidt's original structure. The house has seen little changes since then, despite a fire in 1975 which destroyed large portions of the house. After years of pulling together funds and getting crews to work, the house opened again to the public in 1982.
You can visit the house on Saturdays between 1 and 5pm with a suggested donation of $3.00. A small price to pay to see New York's oldest Dutch Colonial house. A piece of history few get to see, or even know exists. I'm sure there are people in this neighborhood where I live who have no idea the rich history that is just down the road. Along with tours there are all kinds of events that take place. From live music to various holiday specials, it's a place of rich history that every New Yorker should experience.
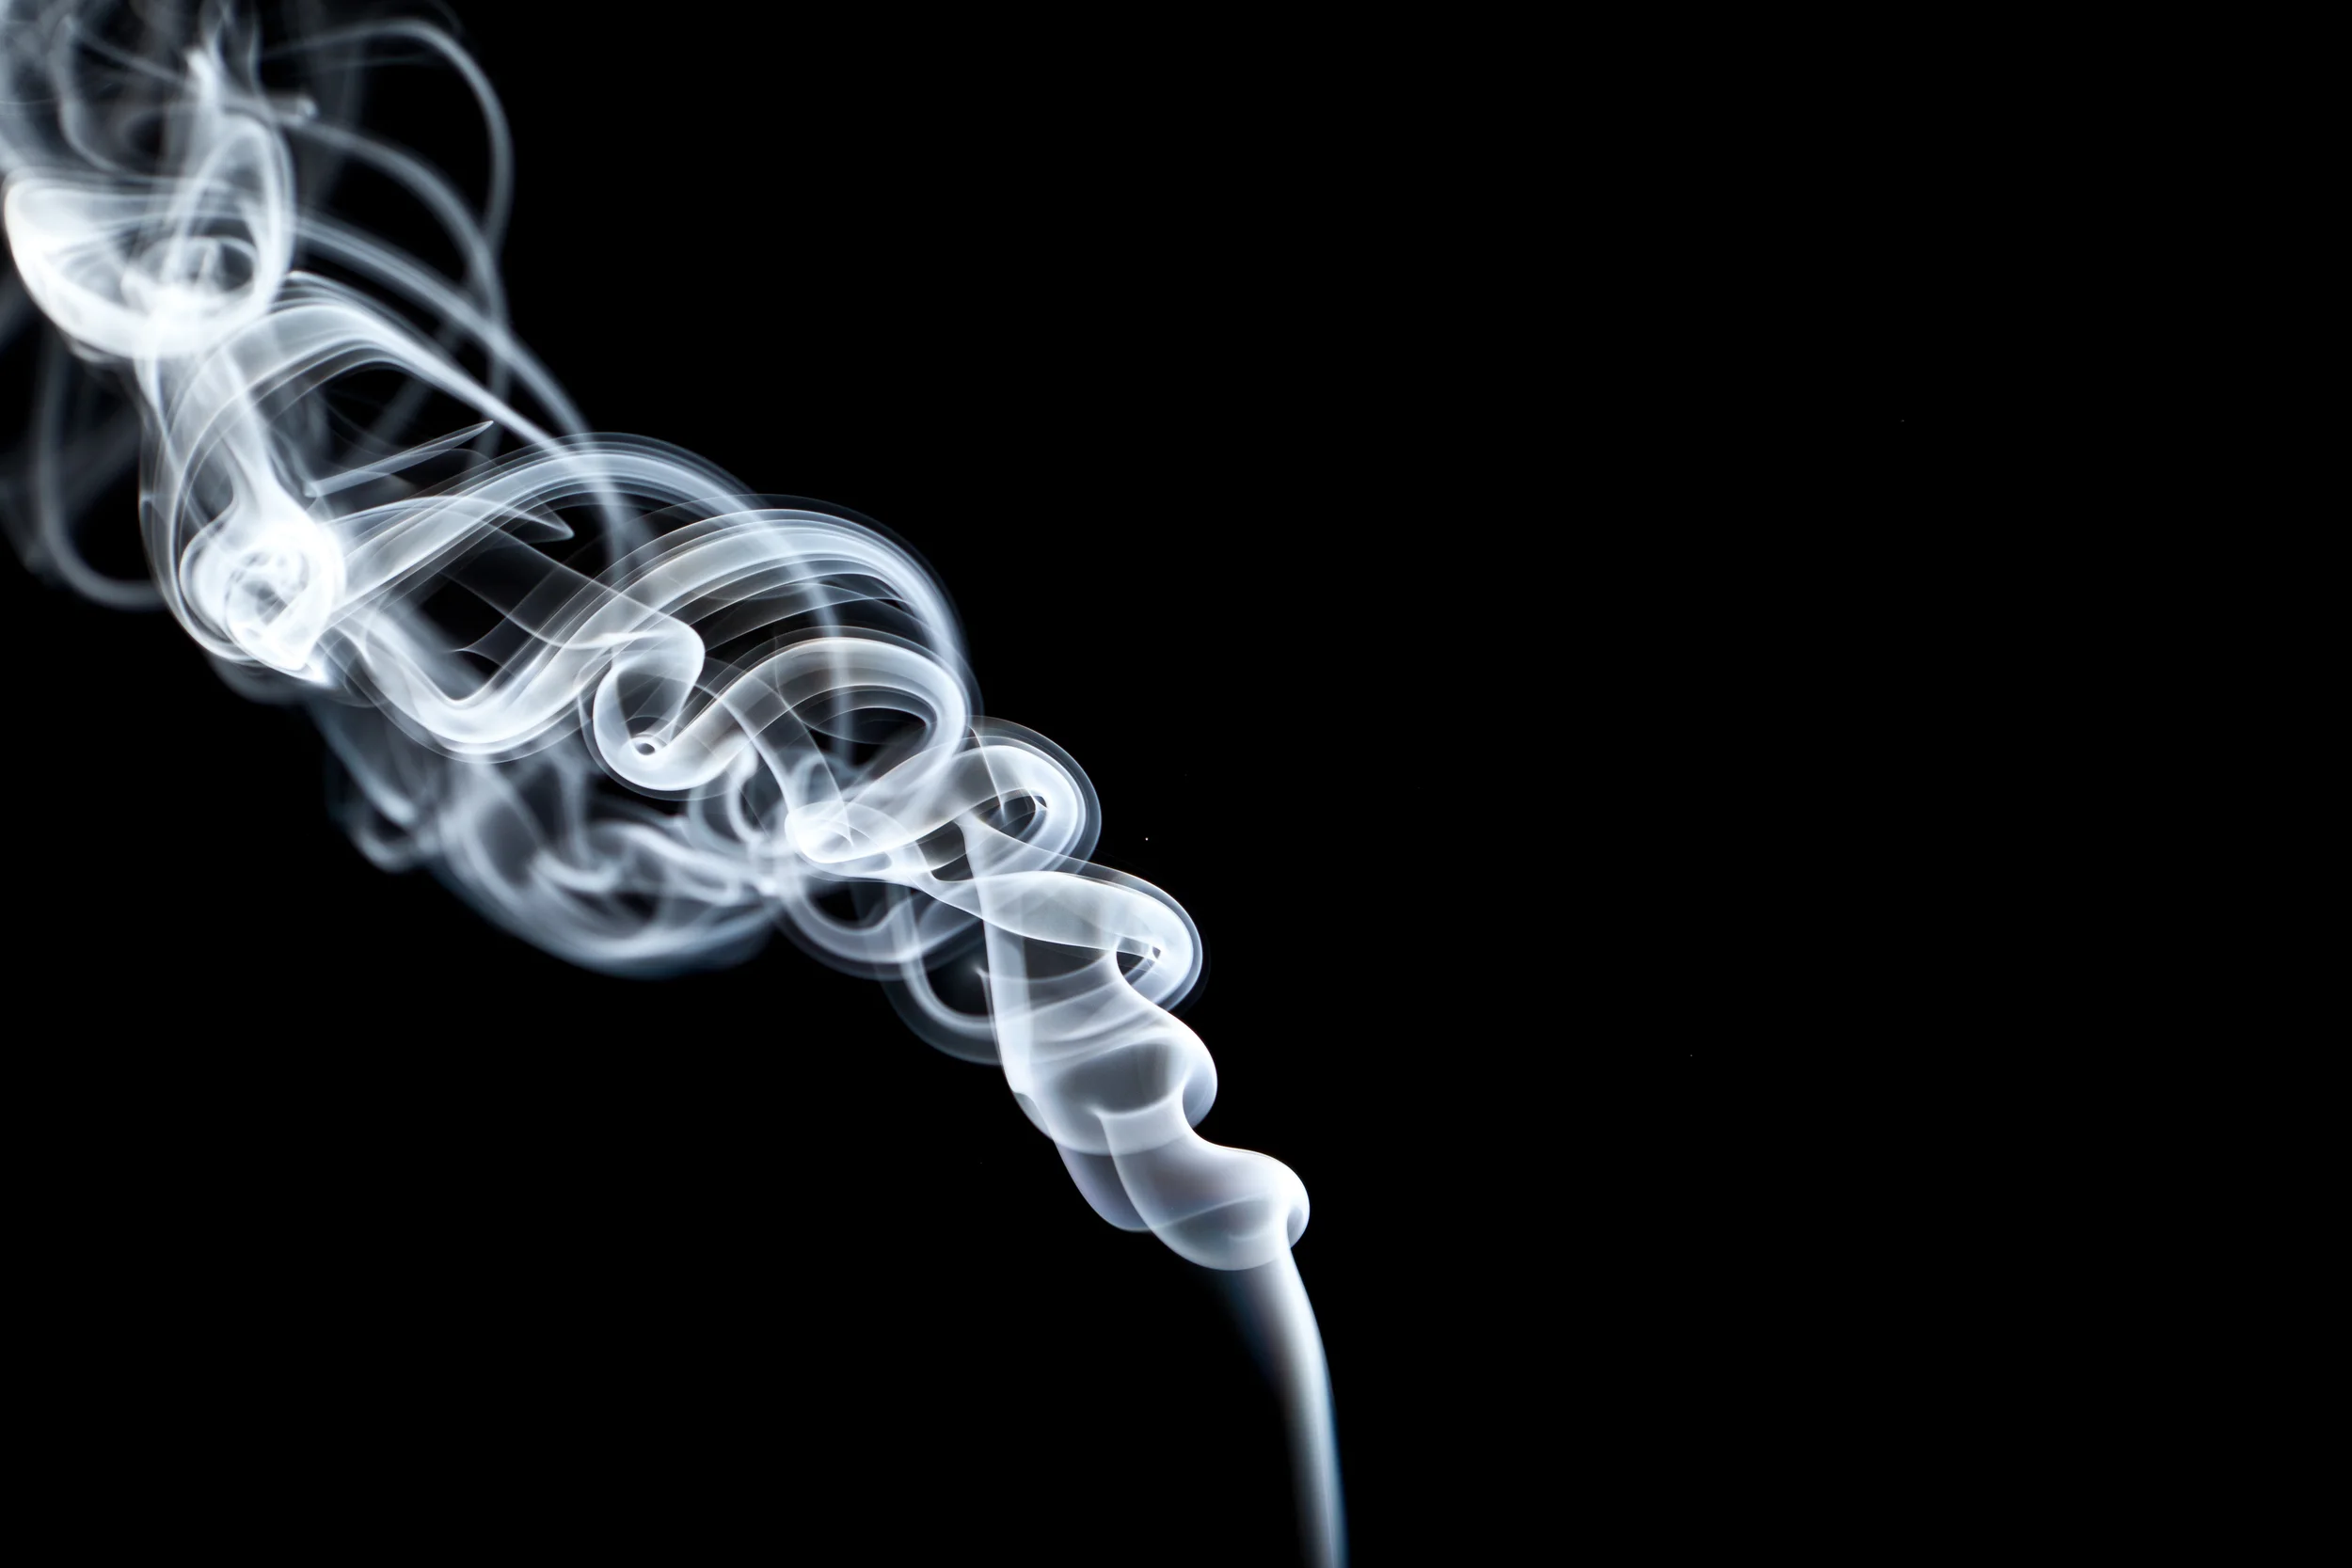
SMOKIN'!
I have a hard time going through my old pictures. I've learned a lot over the years and sometimes I look at old pictures and think "man... what was I thinking!?" But sometimes there are projects where I look back and think "man... what was I thinking? How did I do that and how can I repeat it!?"
I have a hard time going through my old pictures. I've learned a lot over the years and sometimes I look at old pictures and think "man... what was I thinking!?" But sometimes there are projects where I look back and think "man... what was I thinking? How did I do that and how can I repeat it!?" One of those projects was from the Summer of 2014. Some friends of mine have been painstakingly working on a comic book. But it's not just like any ol' comic book you'll find at your favorite store. This one is a massive project. Painted by hand in an oversize book. The artist was feeling uneasy about how his smoke was turning out and needed some reference material. Instead of just looking online we decided to photograph some incense smoke ourselves so we could try different effects to see how the smoke moved and responded to different situations. I had never done anything like it so of course I was on board to give it a shot. What we came up with blew my mind.
ISO 200 - 70mm - f/5.6 - 1/125 sec
That is the test picture I took while the painter and writer where in the other room talking. It's completely unedited (if you read my last blog post you'll see me say I never show unedited pictures, so I'm a bit of a hypocrite right now but I'm showing this for a reason) and it came as a complete shock to me. I literally gasped and called for the others to take a look at this. We were all incredibly excited for the project and started working immediately. So, what'd I do to take this picture?
I spent a lot of time planning for this project. As I said before, I had never done anything like it. First thing I thought was - how do you isolate smoke from the background? I thought, well, smoke is white, we need a black background. But it couldn't be just any sort of black background. Black construction paper? I would need a big piece, or many pieces taped together. I don't know, that sounds like too much trouble and it probably wouldn't work. I could paint my wall black? But returning it to a lighter color would take a lot of paint. Also, I would need matte black, any reflection would be tough to deal with.
Then it hit me. Black velvet! Black velvet is known for being a deep dark black and absorbs light. I went to a local craft store and was expecting to spend a small fortune, I have no idea how much black velvet costs or if it's even easy to come by. Turns out, it's cheap, and most stores have it. $30 for 3 yards. It's easily one of the best purchases I've made to enhance my photography. Every photographer should have a roll of black velvet stashed away, it's incredible.
So that was step 1 - black background complete. Now I need to light my subject. The answer to me was simple - use a flash. A good flash will be bright enough to illuminate your subject no problem. The problem is that most flashes spread the light out in a cone shape. I needed a solid beam. I didn't want the velvet to get lit up at all, so I made what's called a "snoot" to fit on the end of my flash. I had some black construction paper (I used it after all!) and made a tube out of it, taped it to my flash, and voila! A snoot is born! I also used an off-camera flash cord, so I could hold the flash out to my left and fire the beam left to right through the smoke. I had one of the other guys hold up a board so the light would go die in the corner rather than bounce around the room.

ISO 200 - 70mm - f/5.6 - 1/125 sec
This is one of my favorite images to come from that project. As you can see, I didn't adjust my settings from the first picture. Part of me wonders why I did that. I didn't experiment with faster/slower shutter speed. I didn't change the aperture at all, I didn't try a wide angle. I want to go back and try all these things to see what sort of differences they make. But, we were on a roll and I am still very pleased with how the images turned out.
What is this?
I am a freelance photographer and this blog is about my life as such. Sometimes I just need to vent. Sometimes I need to write down my thoughts to remind myself how I should be working. Other times I might just want to write about how I love my dog.
Why is this?
I believe it's important to get your thoughts out of your head sometimes. Some people write a journal for their own safe keeping. Other see therapists. I'm going to share my thoughts with the public. Feel free to communicate with me!